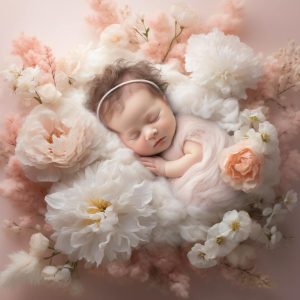
Welcome to the enchanting world of newborn photography, where every tiny yawn, delicate finger, and soft sigh are captured in timeless images that celebrate the purest moments of life.
Whether you’re an aspiring photographer or a proud parent eager to document the early days of your little one, mastering the art of studio lighting is your key to unlocking the beauty of these fleeting moments.
In this beginner-friendly guide, we’ll walk you through the essential steps to set up studio lighting for newborn photography.
No need for complex jargon or confusing technicalities – just a simple, step-by-step approach to help you create stunning, well-lit photographs that highlight the angelic features of your precious bundle of joy. So, let’s dive into the world of gentle illumination and learn how to make your newborn photography truly shine!
Contents
- 1 Deciding on Equipment for Newborn Photography Studio Lighting
- 2 Setting Up the Light Stand and Softbox
- 3 Positioning the Softbox and Light Stand
- 4 Testing Your Studio Lighting Setup
- 5 Choosing the Right Exposure for Newborn Photography
- 6 Tips to Consider for Newborn Photography Studio Lighting
- 7 Conclusion:
- 8 FAQs
- 8.1 Why is studio lighting important for newborn photography?
- 8.2 What type of lighting equipment is essential for newborn photography?
- 8.3 How do I position the lights for the best results?
- 8.4 Should I use natural light or artificial light for newborn photography?
- 8.5 How can I avoid harsh shadows in newborn photos?
- 8.6 What color temperature is best for newborn photography?
Deciding on Equipment for Newborn Photography Studio Lighting
As a newborn photographer, one of the most important choices you will make is what kind of equipment to use for your studio lighting. There are many different options available, and it can be overwhelming to try to figure out which one is right for you. Here are a few things to consider when making your decision:
1. Budget: How much money do you have to spend on new equipment? This will be a major factor in deciding what kind of lighting to go with.
2. Space: How much space do you have to work with in your studio? This will help you narrow down the type of lighting you need. For example, if you have a small space, you may want to consider using compact fluorescent lights (CFLs) instead of traditional studio lights.
3. Type of photography: What type of newborn photography do you want to do? If you want to do mostly posed shots, you will need different lighting than if you want to do mostly lifestyle shots. This will help you decide which kind of lighting will work best for your needs.
4. Personal preference: What do you personally prefer? Do you like the look of natural light or artificial light? Do you prefer soft lighting or harsh lighting? Consider your own preferences when making your decision.
5. Experience level: Are you a beginner or a more experienced photographer? If you are a beginner, you may want to start with a simpler lighting setup. As you become more experienced, you can add more lights and experiment with different lighting techniques.
Once you have considered all of these factors, you can start to narrow down your options and decide on the best studio lighting for your newborn photography business.
Setting Up the Light Stand and Softbox
Setting up studio lighting for newborn photography can be a bit daunting, but once you get the hang of it, it’s really not that difficult! Here are some tips on how to set up your light stand and softbox to get the perfect shot:
First, you’ll want to position your light stand so that it’s about 6-7 feet away from your newborn. Then, you’ll want to attach your softbox to the light stand using the provided adapter. Make sure that the softbox is positioned so that the opening is facing towards the newborn.
Next, you’ll need to attach your light to the light stand. You’ll want to use a light with a built-in diffuser for this, as it will help to soften the light and prevent shadows. Once your light is attached, you can adjust the height of the stand so that the light is positioned where you want it.
Now it’s time to turn on your light and test it out! You can either use a flash meter to test the light, or you can simply take a few test shots. If everything looks good, then you’re ready to start photographing your newborn!
Remember, when photographing newborns, it’s important to keep the lighting soft and gentle. By following these tips, you should be able to create beautiful, soft, and natural-looking newborn photos!
Positioning the Softbox and Light Stand
In order to create the perfect lighting for your newborn photography studio, it is important to position your softbox and light stand correctly. Here are some tips on how to set up studio lighting for newborn photography:
The first step is to set up your light stand in the desired location. Make sure that the stand is tall enough to position the softbox above the newborn’s head, but not so tall that it will be in the way when you are moving around the studio.
Next, attach the softbox to the light stand using the provided brackets. Once the softbox is in place, aim the light stand so that the softbox is pointing down at the newborn.
Now it’s time to position the softbox. The best way to position the softbox is to have it slightly above the newborn’s head and slightly to the side, so that the light will fall evenly on the newborn’s face. You can also adjust the position of the softbox to create different lighting effects.
Once you have the softbox positioned correctly, it’s time to add some light! You can use a variety of light sources for this, but we recommend using a studio flash or LED light. Position the light source so that it is pointing into the softbox, and you’re all set!
With these tips, you’ll be able to create perfect lighting for your newborn photography studio.
Testing Your Studio Lighting Setup
If you’re new to newborn photography, one of the most important things you need to do is test your studio lighting setup. This will help you ensure that your images are properly exposed and that your subjects are illuminated correctly.
There are a few different ways you can test your lighting setup. One way is to simply take a test shot of your subject matter. This will allow you to see how your lighting looks and works with your particular camera settings.
Another way to test your studio lighting is to use a light meter. This will give you an accurate reading of the amount of light being output by your lights. This is a critical piece of information that will help you fine-tune your settings.
Once you have your lighting set up and tested, it’s important to take some time to experiment with different lighting techniques. This will help you find the perfect look for your newborn photography.
One popular technique is to use a single light source to create aportrait. This can be done by placing your light to the side of your subject, or behind them. Experiment with different positions to see what looks best.
Another popular technique is to use multiple light sources to create a more dramatic look. This can be done by placing lights in front of and behind your subject. Again, experiment with different positions to see what looks best.
Once you’ve experimented with different lighting techniques, you should have a good idea of the best way to set up studio lighting for newborn photography.
Choosing the Right Exposure for Newborn Photography
When it comes to newborn photography, one of the most important things to get right is the exposure. The last thing you want is for your images to be too light or too dark – you want them to be just right. But how do you know what the right exposure is?
There are a few things to consider when choosing the right exposure for your newborn photos. Firstly, you need to think about the lighting. If you’re shooting indoors, you’ll need to set up studio lighting. This can be done with a flash or natural light, but it’s important to get the lighting right.
Once you’ve got the lighting sorted, you then need to think about the aperture. A wider aperture (lower f-stop number) will result in a shallow depth of field, which can be great for newborn photos as you can blur out the background and really focus on the baby.
However, a wider aperture also means that less light will be let in, so you need to be careful not to underexpose your images.
The next thing to consider is the shutter speed. A slower shutter speed will let in more light, but it will also mean that any movement will be captured in the photo. This can be tricky with newborns, as they tend to move around a lot! You don’t want to use a too slow shutter speed though, as this can result in blurry photos.
Finally, you need to think about the ISO. A higher ISO will let in more light, but it can also result in grainy photos. This is something you need to experiment with to see what looks best for your photos.
So, those are a few things to keep in mind when choosing the right exposure for your newborn photos. Take some time to experiment and see what works best for you.
Tips to Consider for Newborn Photography Studio Lighting
As a photographer, one of the most important things you can do is ensure that your studio is properly lit. This is especially important when photographing newborns, as they are often sensitive to light and can be easily overexposed. There are a few things to keep in mind when setting up your studio lighting for newborn photography.
First, you’ll want to make sure that your lighting is soft and diffused. newborns have very sensitive skin, so harsh lighting can be damaging. You’ll want to use softboxes or umbrellas to diffused the light and create a softer look.
Next, you’ll want to pay attention to the color of your light. Warm light is often best for newborns, as it can be calming and soothing. However, you’ll want to avoid using too much yellow or orange light, as this can make your subject look jaundiced.
Finally, you’ll want to consider the placement of your lights. When photographing newborns, you’ll want to avoid having any direct light shining in their eyes. Instead, place your lights off to the side or behind your subject. This will help to create a more flattering light on your subject’s face.
By following these tips, you can create studio lighting that is perfect for newborn photography. With soft, diffused light and a warm color palette, you can create images that are both beautiful and gentle.
Conclusion:
In conclusion, newborn photography is a wonderful way to capture the beauty of a new life. By following these simple tips on how to set up studio lighting, you can create amazing images that will be cherished for a lifetime.
I hope this article has given you some good ideas on how to set up studio lighting for newborn photography. If you have any questions, please feel free to leave a comment below and I will be happy to answer them.
FAQs
Why is studio lighting important for newborn photography?
Studio lighting is crucial for newborn photography as it allows you to control and enhance the lighting conditions, creating a soft and gentle atmosphere. Newborns have delicate features, and proper lighting helps capture the subtle details, while also ensuring a comfortable and safe environment.
What type of lighting equipment is essential for newborn photography?
For newborn photography, you’ll need soft and diffused lighting. A good starting point is a quality continuous light source, such as softboxes or umbrellas, to achieve a flattering and even illumination. Avoid harsh, direct light to prevent harsh shadows on your newborn subject.
How do I position the lights for the best results?
Place your lights at a 45-degree angle to the subject, aiming for a soft, wraparound effect. This minimizes shadows and creates a natural, pleasing look. Experiment with different angles to find what works best for showcasing your newborn’s features.
Should I use natural light or artificial light for newborn photography?
While natural light can be beautiful, it’s often unpredictable. Artificial lighting gives you more control over the environment. If you’re using natural light, position your subject near a large window, but be mindful of changing light conditions throughout the day.
How can I avoid harsh shadows in newborn photos?
Harsh shadows can be distracting in newborn photography. Use diffusers or modifiers on your lights to soften the light, and position them strategically to minimize shadows. Also, consider the angle of your lighting to ensure a gentle, flattering effect.
What color temperature is best for newborn photography?
Opt for a color temperature around 5000K to 5500K for a natural and warm look in your newborn photos. Adjustments can be made in post-processing if needed, but starting with a neutral color temperature is generally a good practice.

